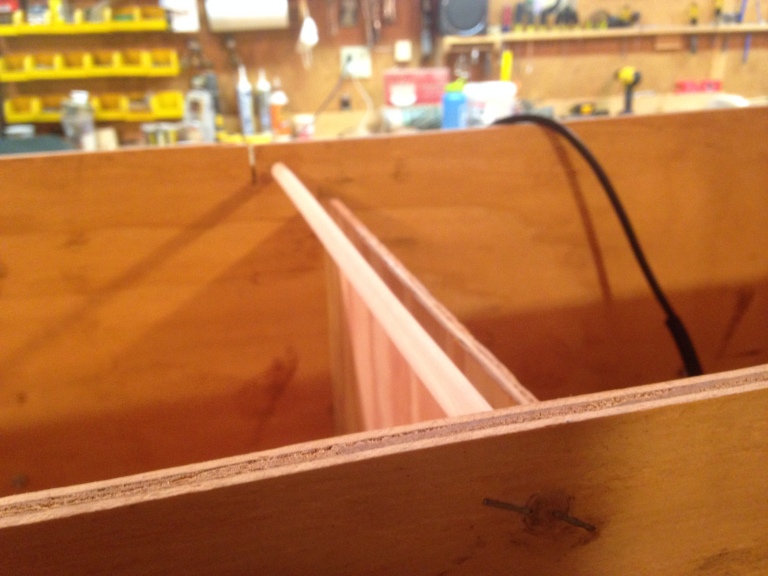
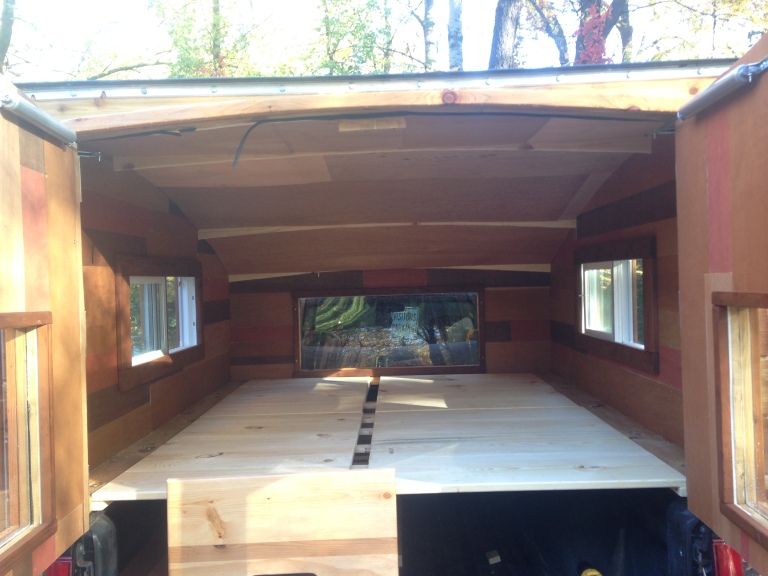
I started the interior by filling the walls with 1 ½” pink foamboard insulation. I chose to insulate the ceiling with 1” polystyrene because it was cheap ($5 for a 4’x8’ sheet), and is more flexible than the pinkboard, allowing it to form to the roof contour.


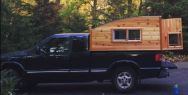
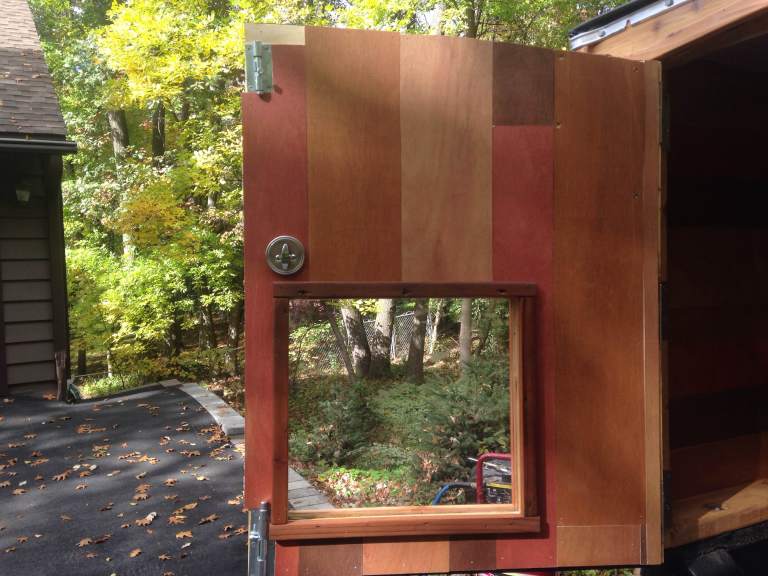
Meanwhile on Pinterest, I found cool ideas for pallet walls, or “accent walls”. I found an article where a couple bought an entire wall’s worth of 2×4’s, stained them various colors and installed them at random. I thought I’d copy the idea, but use 1/4” plywood instead. I bought two 4’x8’ sheets of plywood and ripped them into 4” and 6” pieces. Then with the help of Sofia, the staining process followed.


Installation of my “pallets” was much more difficult than expected. Having only a few studs to work with, a lot of my pallets were hanging loose, requiring either contact cement (this is when the water-based contact cement comes handy. The stinky stuff will eat foamboard away). I also used the foamboard adhesive that comes in a caulk tube.
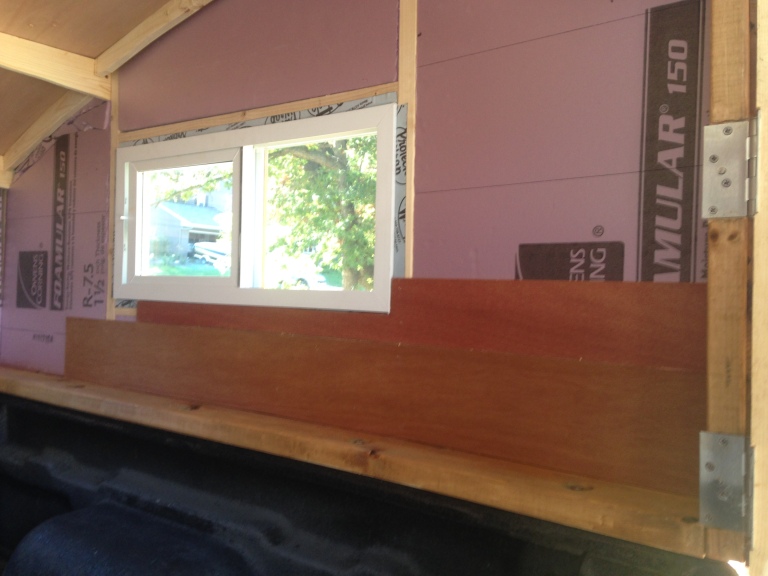
I salvaged some weathered wood that was aging in someone’s backyard, thinking it would look nice for the interior window trim. Sofia was the designated nail-puller, then I cut to the appropriate dimensions, sanded, stained, and nailed them into place.


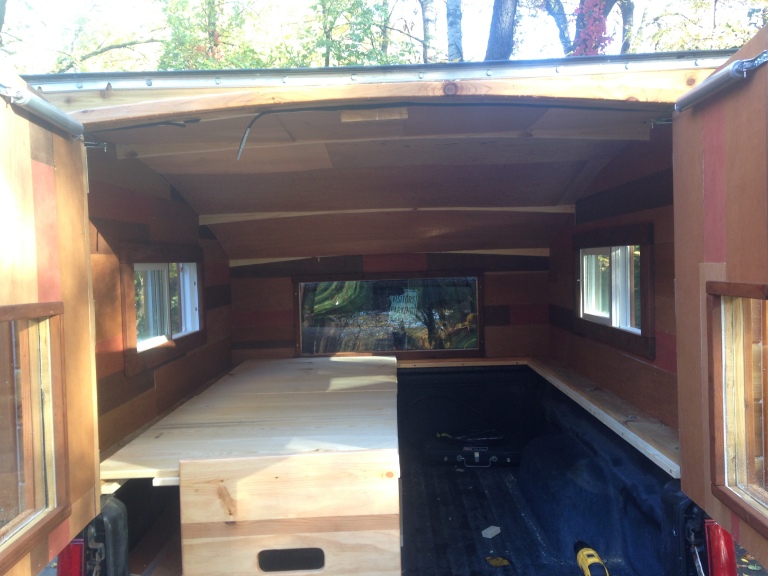
With time the walls came together and the ceiling was the next task. This was done in a similar manner, but with larger sheets of 1/4” ply that I had laying around. I don’t exactly care for how the ceiling turned out, but it was free and I can fix it up in the future should I care to. Or just add cool mountain posters.
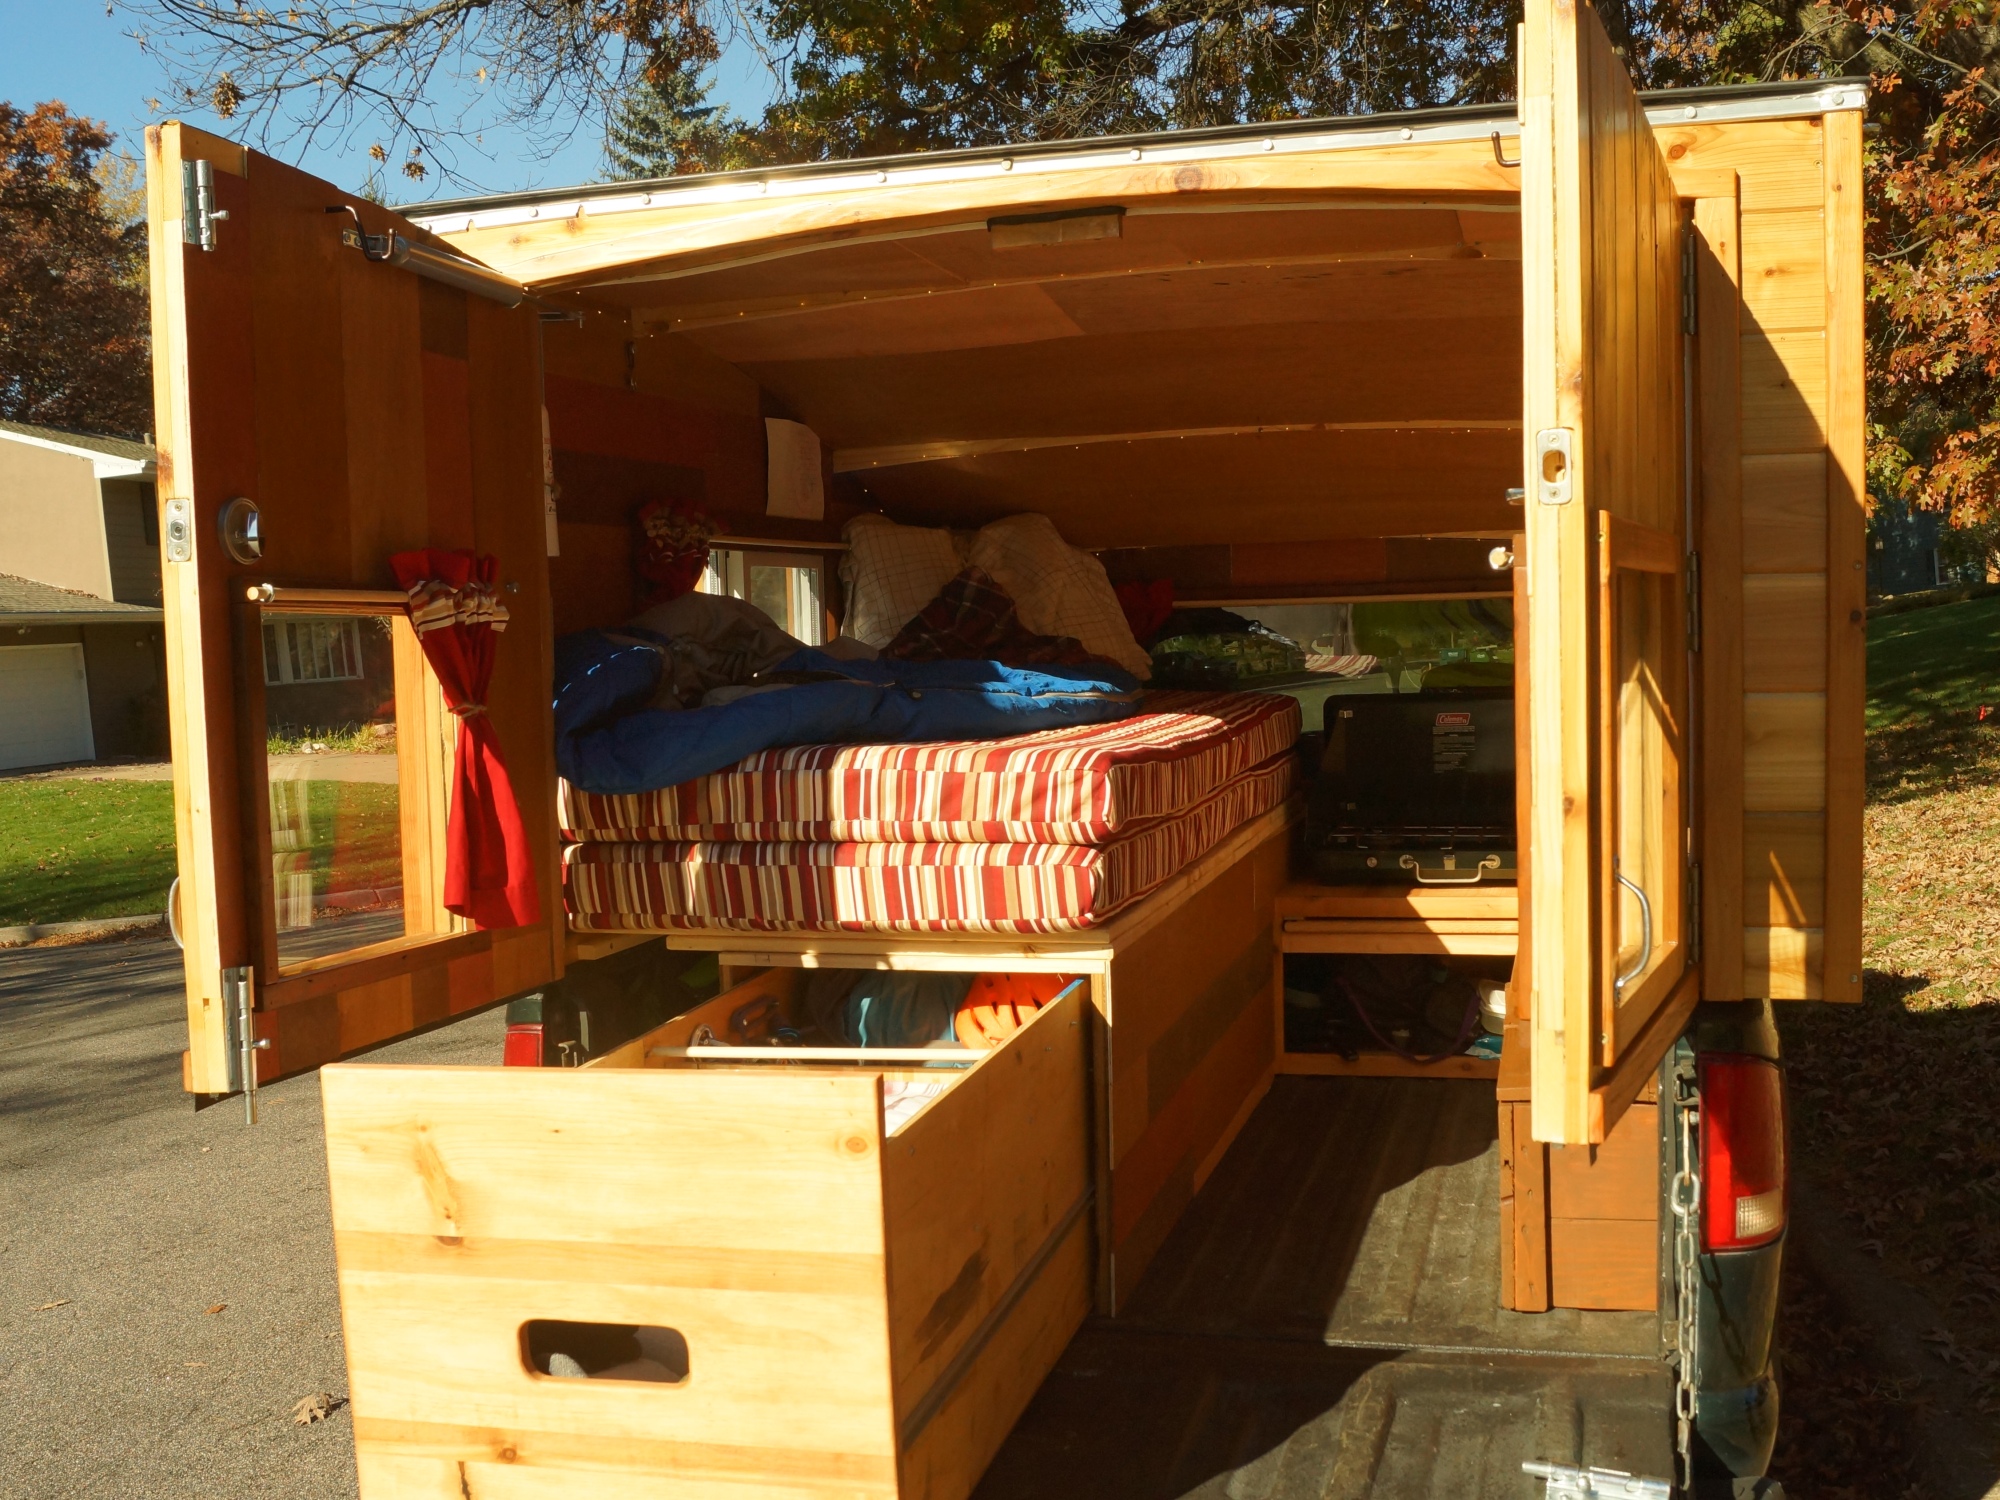
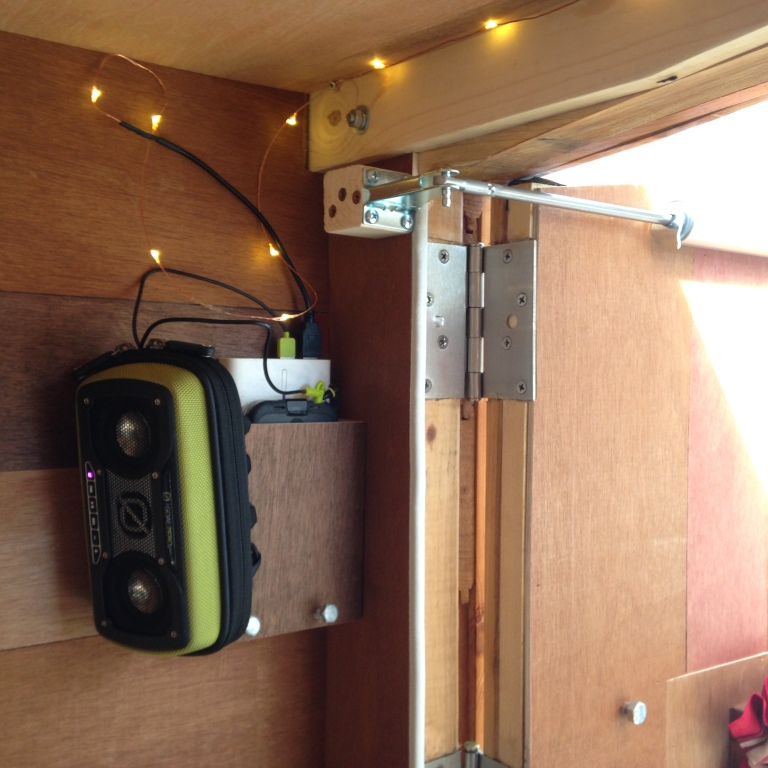
I also added pneumatic door-closers to keep my doors from swinging loose. These were cheap and I only needed to add one chunk of wood to install them (see photos).


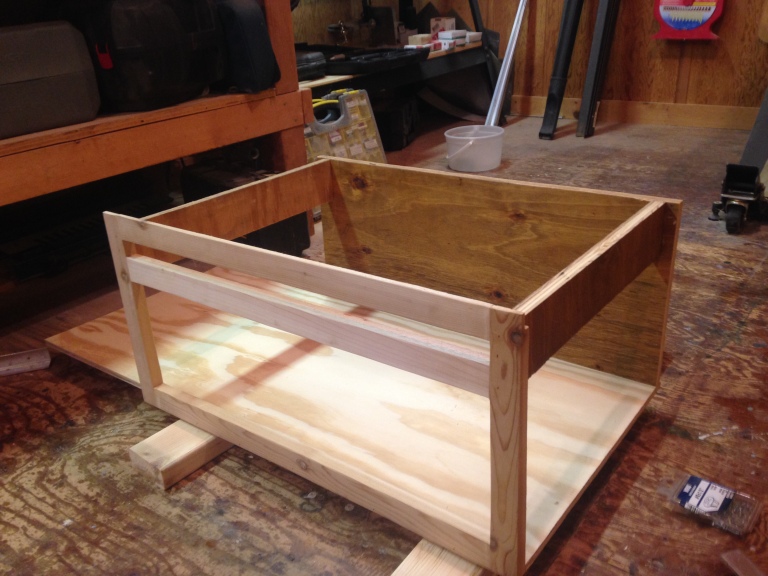
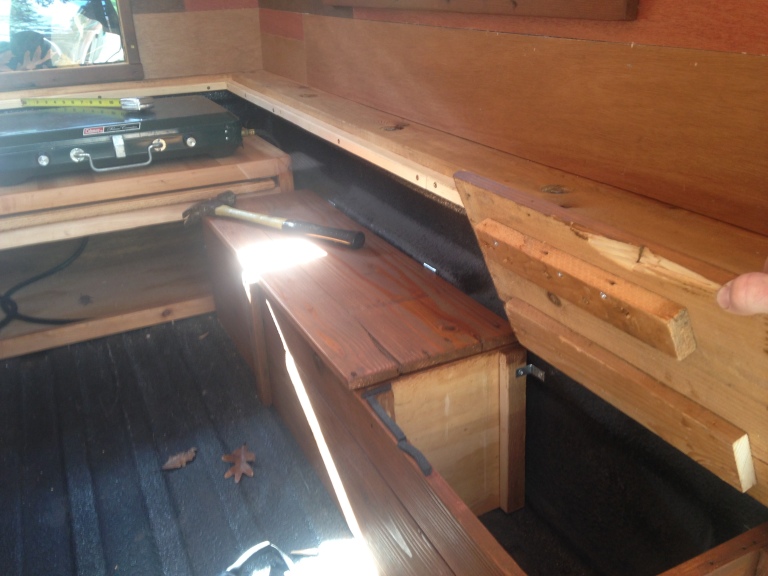
I started the cabinetry with the bed frame. To maximize and maintain convenient storage, I decided to make it a drawer as well. I started organizing a list of large items that would create dimensional limitations on the drawer. The shorthand version consisted of a snowboard and propane tank. I knew I could tuck a snowboard in between the wheel well and bed frame, and a propane tank would have to fit behind my large drawer. After heavy qualitative estimations, I denoted the bed frame dimensions as 48″ long, and 20″ wide (arbitrary).
Considering 48” drawer slides were over $150, I immediately began researching DIY alternatives. Pinterest and I were on a hot streak that week and I found this awesome article on DIY, heavy duty drawer slides: Go here, all credit to this dude.
So I went to my local Axe-Man Surplus store, grabbed a few handfuls of roller bearings, then went to Menards and scrounged around until I found the cheapest metal [drawer slide] possible. I found this C-channel type of aluminum bracket, generally intended for garage shelving. I grabbed two 48” lengths and began assembly.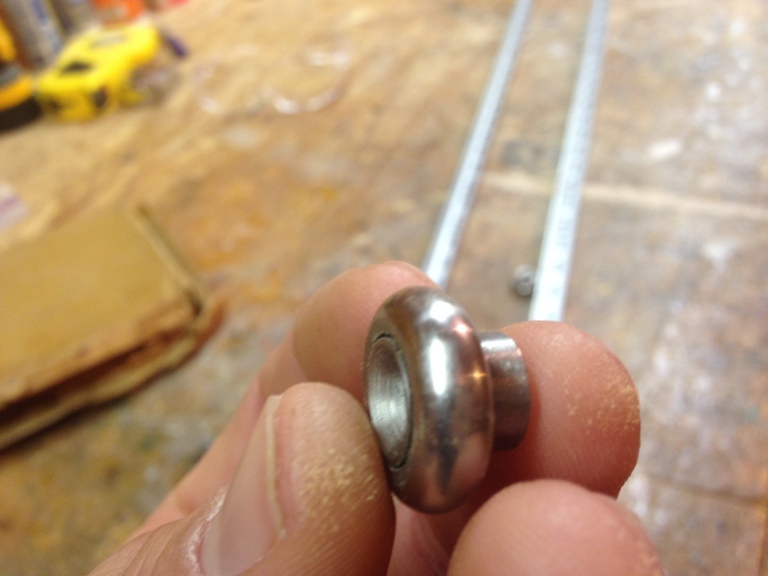
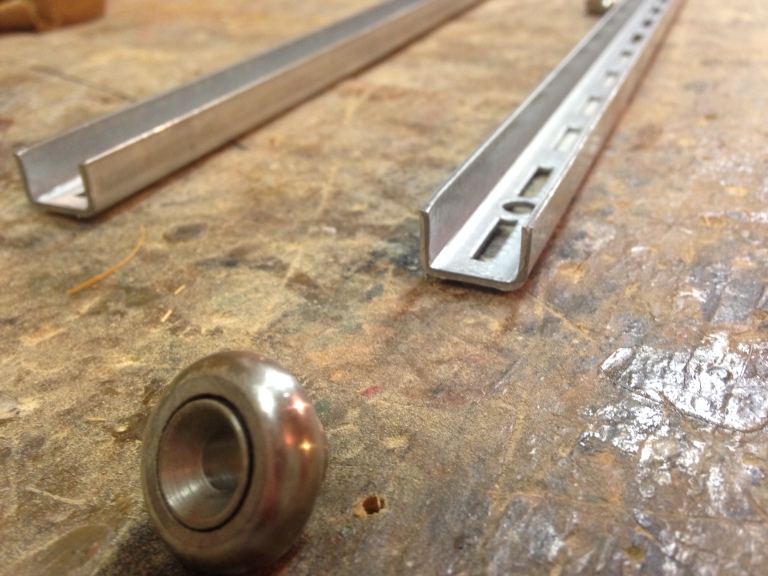
I went with the quick-n-dirty method for the box frame. I salvaged a 4’x8’ piece of ¾” plywood and designated that as the integrity and strength of the box. I ripped the plywood into 17” strips because this is the exact height from the bottom to the top of the truck bed. Then I used 1” wood screws to secure the roller bearings.
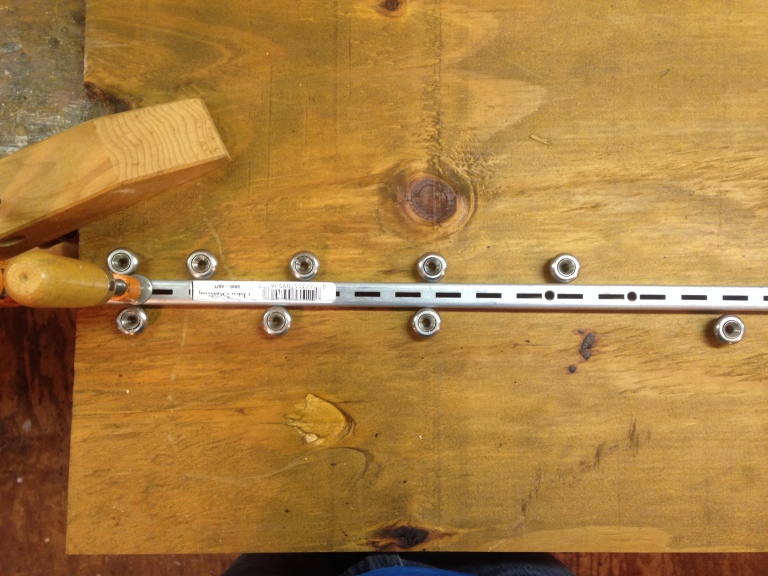
It worked out just perfect that the bearings had the exact flange dimension as my screw heads. Notice I used my aluminum C-channel as a reference. Also note the placement of bearings, favoring more to the end of the box frame. The highest stress concentration exists when the drawer is fully extended, so adding additional bearings toward the end of the box lowers the stress per bearing.
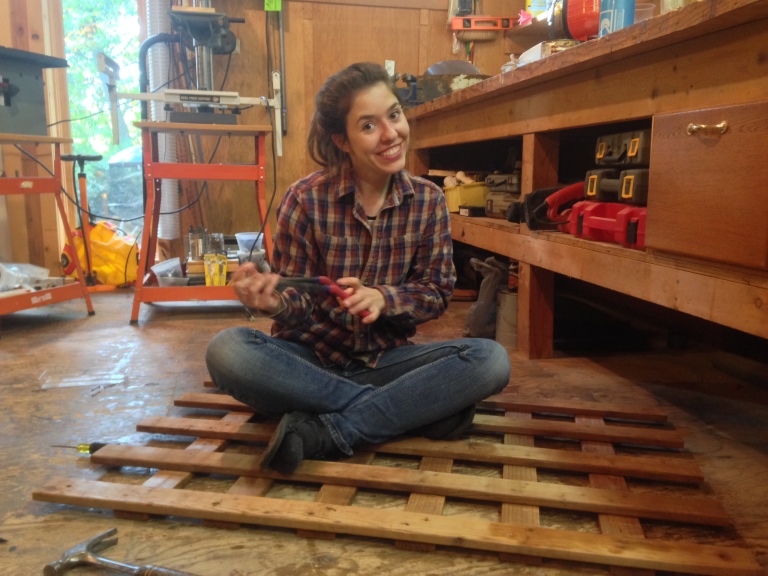
Then I grabbed some scrap 2’x4’s, ripped them into ¾” bed slats, and screwed them in place in 9” increments. The entire width of the box is 20”. This would allow me to keep two snowboards in the left wheel-hub storage area (bindings removed), but also maintain plenty of foot room on the right hand side of the living area.


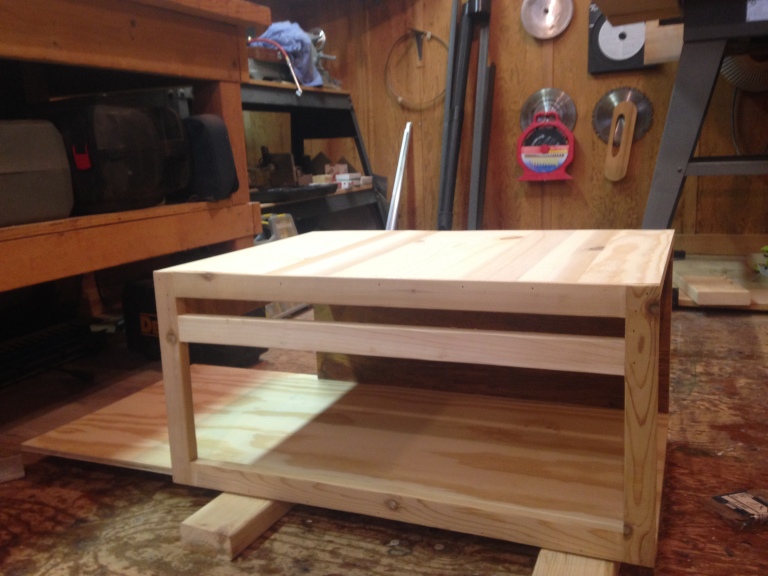
I built the large drawer next, using the inner dimensions of the box frame for reference. The walls were composed of ½” plywood which I had in excess. I made a few pine reinforcements, used plenty of glue, screws and nails. I used a sheet of ¼” MDF for the bottom, reinforced with glue and ½” screws. Then I screwed my C-channel into place with ½” screws and tried it out.
Not very smooth. Rickety rather. Of course theory works in funny ways. I spent the next half-hour perfecting it. Instead of a smooth, frictionless slide I was getting a bumpy ride and grinding on the box frame. I tinkered with a few roller bearings that I’d noticed were hugging the drawer slide too tightly. After reinstalling them the slide was a lot smoother.
After fine tuning the drawer I installed the box frame. I found some 1 ½” steel elbow brackets at the hardware store and screwed two of them into the back of the bed and two into the front. I did a quick shake test and the box stayed in place.
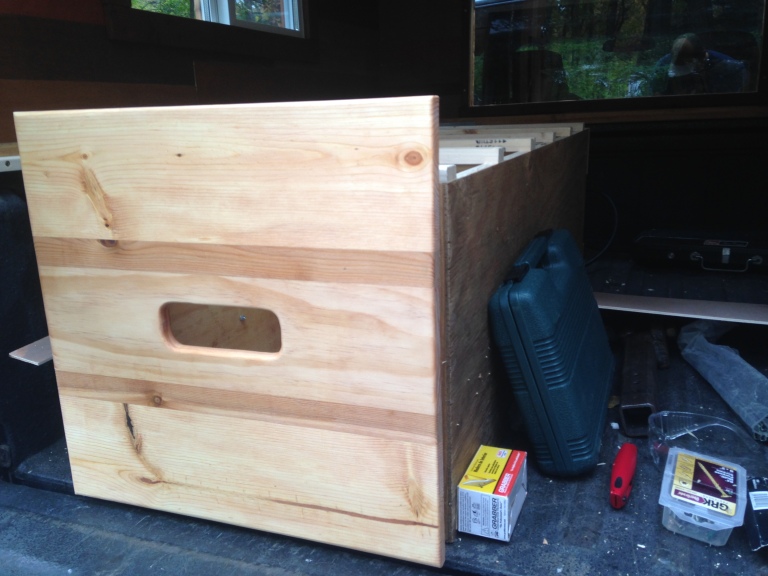
Utilizing scrap lumber from the shop, I glued together pieces of pine and cedar for the drawer front. For finishing touches I cut an ovular hole for my drawer pull, and hit it with a roundover router bit. A few screws later and the drawer was finished.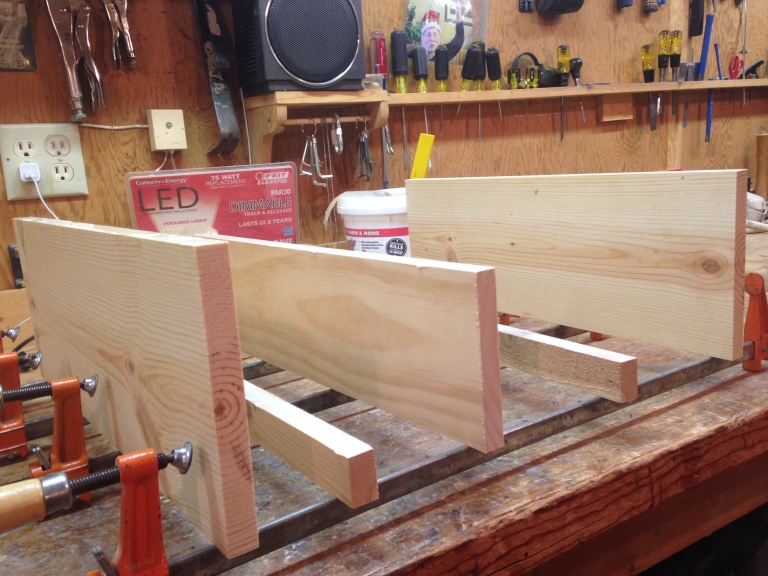
Then I glued and screwed bed rails around the perimeter of the sleeping area (shown later).
I decided to glue 1×12 pine boards together for my bed platforms. This was a lot cheaper than using plywood and lighter in weight. My bottom, and stationary boards would sit directly on the bed slats. The top boards were designated to be the sliding boards, which would of course, sit on top of the bottom boards. The finished dimensions of my bottom boards are 24”x35” and the top boards measure in at 28”x35”. I didn’t sand them but rounded the edges with a router before calling them ready.


I tossed the bed boards in the truck and was surprised how smoothly they rode on each other! The conversion from 1-person to 2-people takes about 30 seconds and is really simple. Take a look below for extra fun.
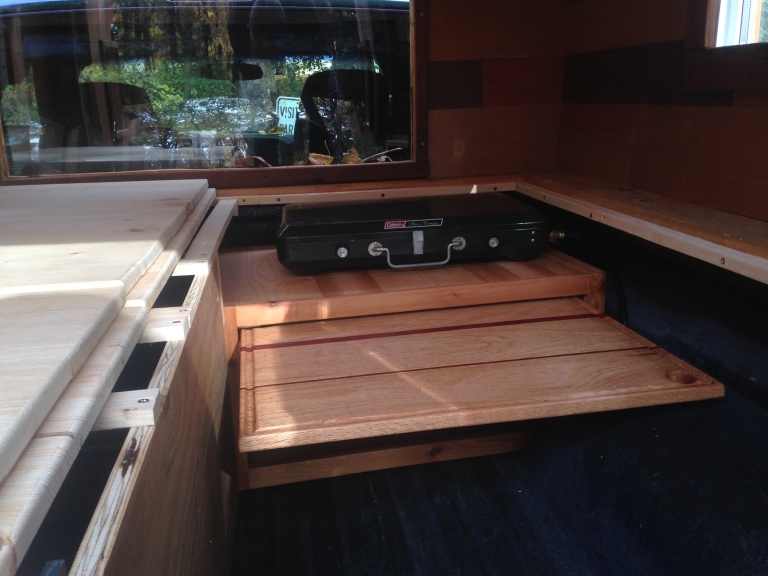
I found a propane 2-burner Coleman Stove on Craigslist for $30 and wanted to keep it handy for daily use. I drew up plans for a simple shelf to act as my kitchen. After rustling around I found some more pine, cedar and maple that I could use for the top of the shelf. I glued these together and waited a day to plane and sand.
The face frame was designed to house a hardwood cutting board in the top opening and keep pots and pans in the lower section. I ran a ¾” dado in the top of the face frame to hold the top in place. When all was ready I glued and nailed the shelf together. I used ¾” plywood for the side rails and back, and ½” ply for the bottom.
Installing the shelf was the same as the box frame. It only took 3 elbow brackets and the shelf was sturdy.
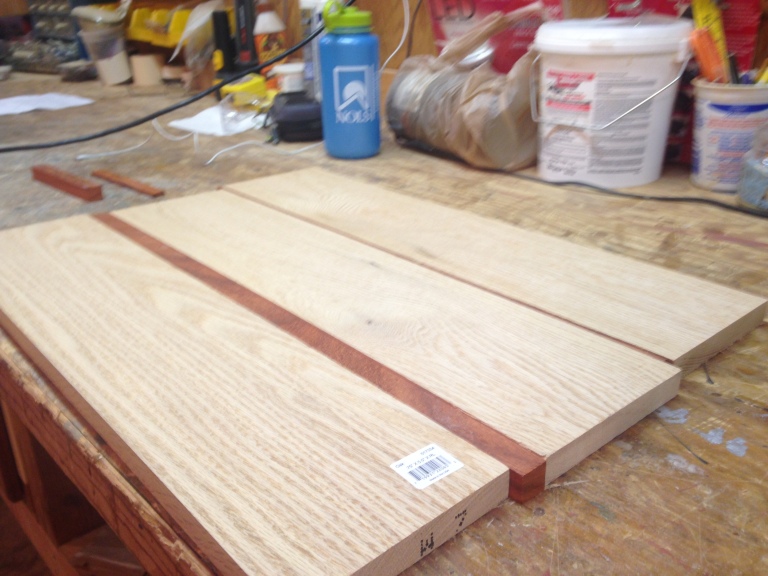
I had some Red Oak and African Padauk left over from a previous project. I glued these together so I could have a drawer that was also a portable table and cutting board. The finished dimensions are 27″x19″. After some work with a router and mineral oil it looked ready!

I used a few more pieces of ¾” scrap as drawer slides for the cutting board.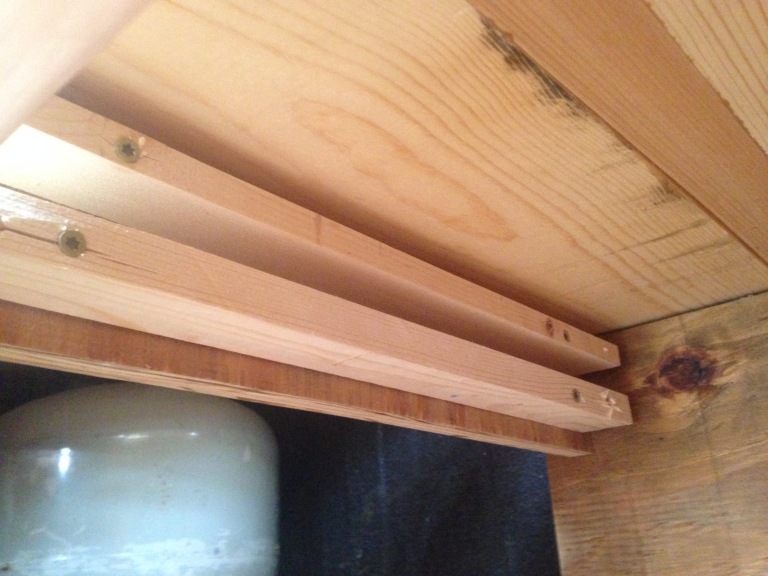
The last addition was a small cabinet to cover the wheel well. I salvaged a few wood boxes that were going to a dumpster and started removing nails. I took a few measurements and began cutting to size. To reassemble, I used the existing nails to keep the look of weathered boxes, then sanded. After a little stain the cabinet was ready to install.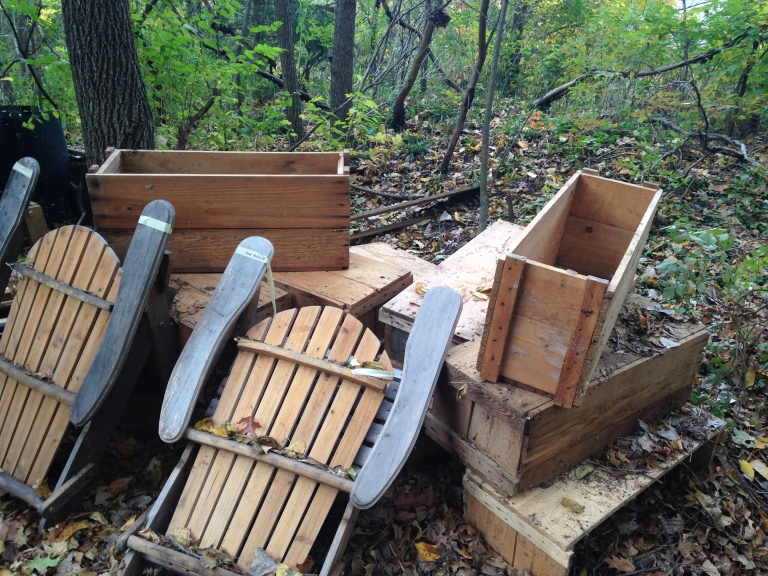
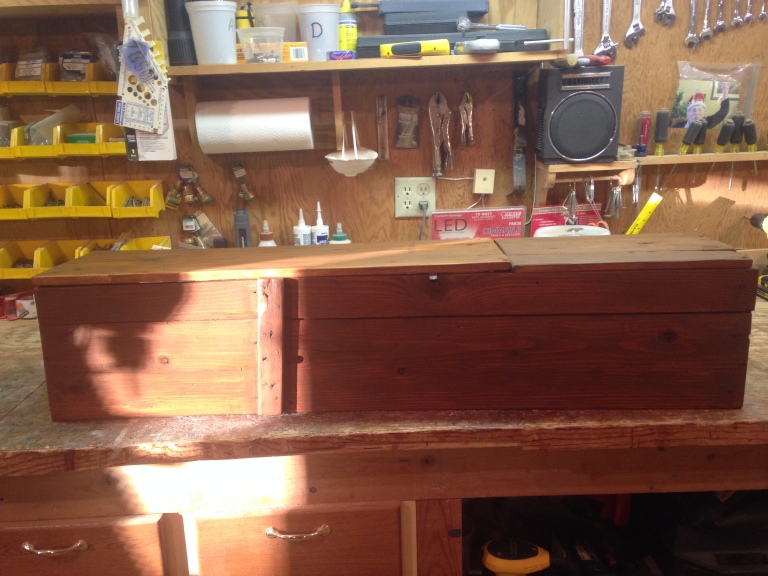
I used 5 elbow brackets to fix the cabinet to the truck bed. I added a few hinges for the cabinet tops and the dimensions worked just right. With the help of my four year old nephew, I added a few pieces of spare weatherseal foam so the cabinets would close softly.
After leaf-blowing and vacuuming the structure I was ready to add curtains. The curtains were custom designed and sewed by my Mother who did an awesome job. I screwed in J-hooks and threaded 7/16” pine dowels to act as curtain rods. I also used a bit of [very rustic] twine and a screw to hold the curtains back when I need to see through the windows.


To illuminate the interior I ordered some USB-powered, warm-colored LED “fairy” lights on Amazon. I built a simple wood pocket to keep my USB brick and iPhone, added a few lag bolts to hang accessories, then plugged in the LEDs. I drilled a few holes in my ceiling joists and strung them on existing screws.

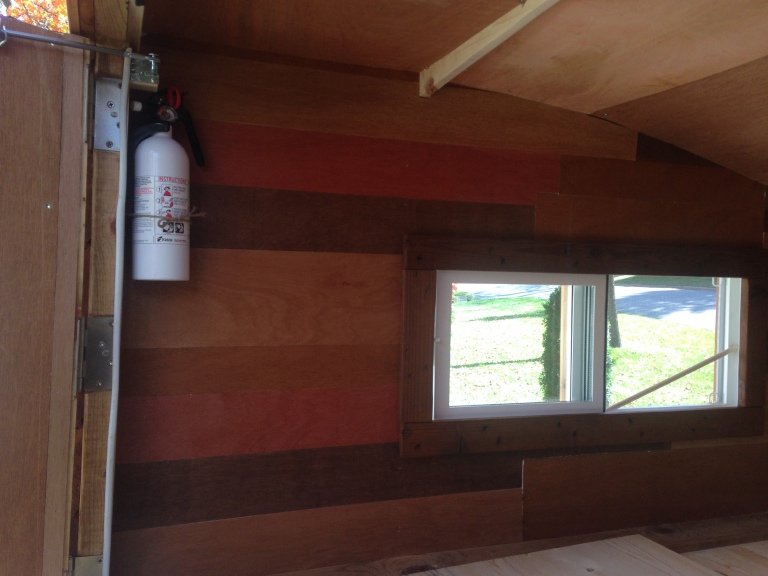
CO detector and fire extinguisher. Good insurance. Also note the twine that I call a cargo net. I tensioned it using a trucker hitch. Works surprisingly well to hold fruit, paper towels, jars.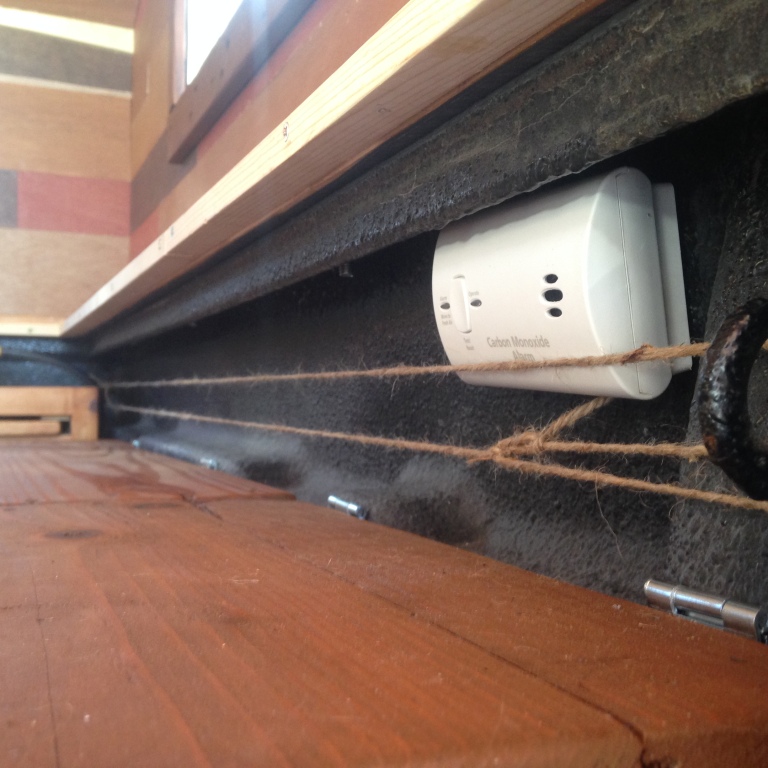
More finishing touches. I picked up an 11lb propane tank and 12ft propane hose for my two-burner Coleman stove. I assumed the extra hose would be nice so I can cook in the back of the bed or bring the stove out to the tailgate without having to mess with plumbing.
I also finished the box frame with extra ¼” “pallets” to cover up the weathered plywood.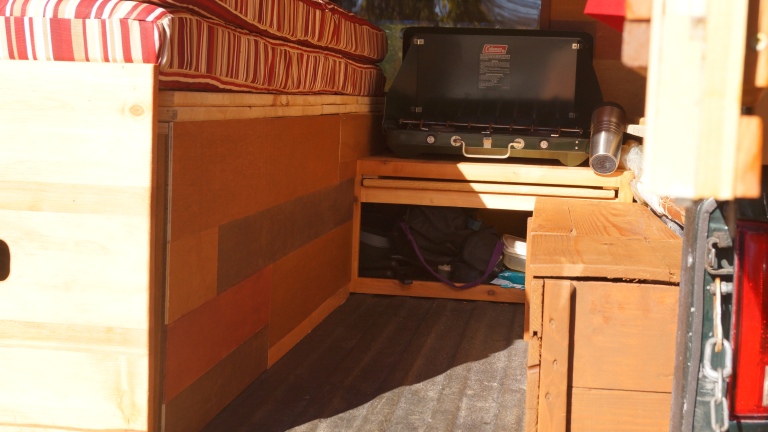
I was given this trailer hitch insert and thought I could make a step out of it. I found some pressure-treated 2×12, cut it to 24”, hit it with a router, drilled a hole and stained it. I assume it’s just large enough to mount a cooler during the summer months, further saving me storage space inside.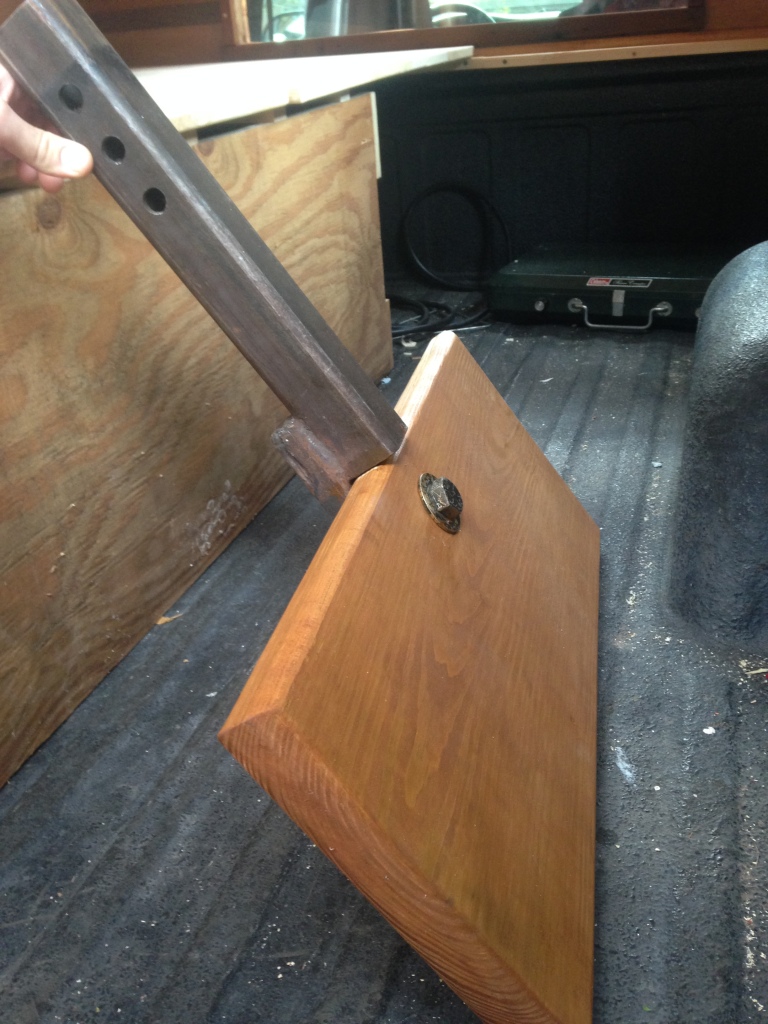
Also collecting dust in my parent’s garage was a roll of red waterproof tarp fabric (extra from a previous rain-fly project). I cut the sheet to the right width, and then added grommets so the fabric would make a tight seal with the tarp hooks below my roof.
The idea of this awning is to utilize the back doors as ‘tent poles’, quickly converting the tailgate to an area of dry refuge in a rainstorm. I tied parachute cord to each of the grommets, allowing the awning to be tied-off to the truck itself, trees/light poles/branches, or even tent stakes.
After rolling up the tarp, I found the perfect size mesh bag (Petzl rock climbing harness bag), and tossed in a few tent stakes. As I search through my memory cards, I cannot find photos of this process, but will surely add them after the next rainstorm. It is currently December and 0 degrees F in Colorado, so stay tuned for that update.
To add storage options to my large drawer, I cut extra ¼” plywood to act as shelves. I added a few screws and lag bolts to the walls for various shelf locations.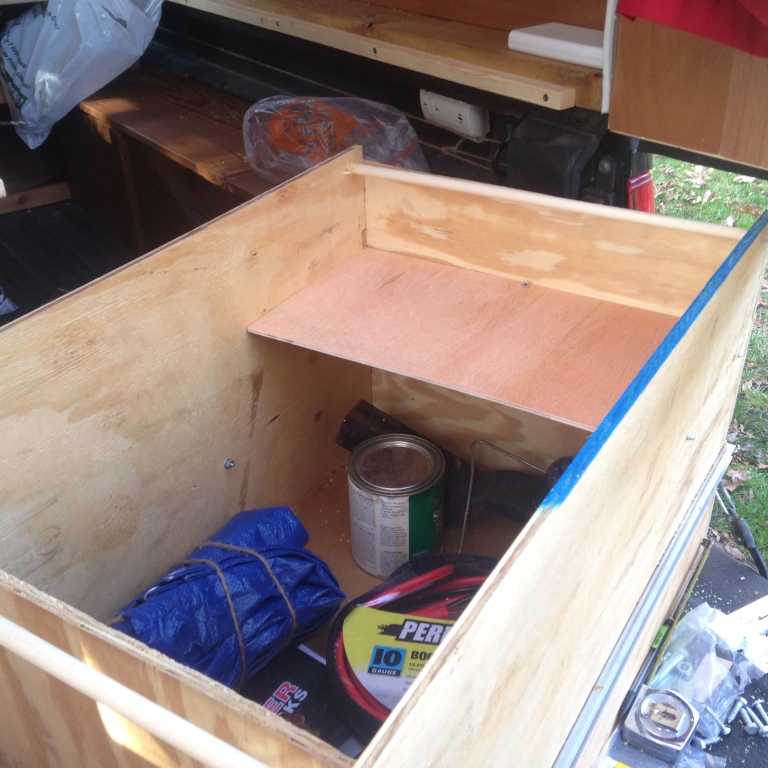
This is when I started “packing” for an extended roadtrip. I organized my climbing equipment and miscellaneous snow gear in the back half of the drawer, and all of my clothing in the front.
The fun part, putting it all together. I put my bed boards back in place. Then I added my mattress pads (Each 3”x73” high density foam. Upholstery done by Mother McDonald). Last additions were pillows, sleeping bag, baby blanket (integral addition), cracking a beer.
Enjoy a little slideshow of my (for now) finished product.
Next up, further considerations, taking this thing on the road, and trying not to be unemployed!

Hi I really love your design. Favourite thing is that you have the leg room on the side to crawl or half walk. That way since bed doesn’t take up the whole box you aren’t getting wet boots and clothes all over your sheets.
I was wondering if you could post some more pics of how the sliding bed works to switch from 1 person to 2 person configuration. Are they mounted to the bed cabinet in any way or do they just sit on top? And do they attach to each other at all or just rest on top of each other in the 1 person? Thanks for your time. Dane
LikeLike
I don’t have access to the truck for a week now, but the photos above show it fairly well. The boards are just floating, they aren’t fixed to the cabinet in any way.
If you look closely, when you pull each board across, there’s a 1″ strip of pine that runs the entire length of the truck bed (on both sides). Each bed board sits on its respective 1″ strip. Then you pull the bed mats across, filling up the entire camper space.
LikeLike