Below you will find a bulleted list, in arbitrary fashion of considerations that came upon me after finishing my project.
- Hofstadter’s Law: It always takes longer than you expect, even when you take into account Hofstadter’s Law.
- Don’t build this unless you have an amazing workshop (Shoutout to Jon Wallace).
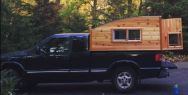
- You may notice my original CAD design has a spherically contoured roof and single back door. I originally built a single backdoor before realizing that it was exerting too much moment on the door frame. It was much heavier than expected and would have eventually torqued the entire structure out of square.
I also started building a spherically contoured roof until I realized it would be very difficult to complete. My EDPM roofing membrane was fairly rigid and would not have formed to the spherical contour, resulting in large creases. I assume Peter at Casual Turtle Campers had a more malleable roofing membrane. Or he is a magician. Probably the latter.
- I realized that my cutting board fits perfect on top of the large pullout drawer, a plus, giving me the option of another table on the tailgate.
- Some will argue I shouldn’t have used basement windows, especially dual-paned windows; because they can fog up from vibrations. I have seen a lot of tiny homes that have used similar sliding windows and gotten away without issues.
I am certain that using these windows would have been fine; however I framed mine too tightly. After leaving my truck in a sidehill/uphill position for 3 straight days, I went for a two hour drive. After arriving, one of the fixed panes of my sliding windows had cracked. I didn’t hit any bumps along the trip.
I assume this was due to a slight deformation in the frame’s position as it sat on the hill; upon driving the frame quickly shifted back to normal and stressed the studs surrounding the window.
I am later learning that as a novice tiny home builder, I should have framed the windows to have ¼” of clearance on EACH side. All gaps would have been filled with expansion foam, and the extra clearance would allow the vinyl nailing fin to take the high stress load, rather than the glass windows, causing them to fail.
- Weeks later with a fully-loaded drawer, the drawer slides have broken in perfectly. The drawer will actually release itself if I open the tailgate while parked on an incline.
The actual cost of this DIY drawer slide was $22!
- Mattress pad dimensions are 3”x31x73”. The interior’s dimensions were exactly 73” long, and after adding trim to my windows, I had less than 73” of bed-room. This unfortunately meant that my mattress pads become slightly compressed when I shut my back doors.
- My 22,000 mAh ‘brick’ battery lasts 10-12 iPhone charges. I have also run the LED lights alone for 8-10 days, using them 1-3 hours a day before I killed the battery.
A lot of folks suggest I should have used solar and an auxiliary car battery to power my setup. For my purposes, this wasn’t practical. This is more of a camper than a mobile home. I wanted to keep costs down, so solar was out immediately. I also considered an aux. car battery but decided against it because of lead battery acid.
I would be storing the battery near my climbing equipment. This means that if I didn’t die of my rope suddenly snapping, I would probably die from lead battery acid cancer within 2-80 years.
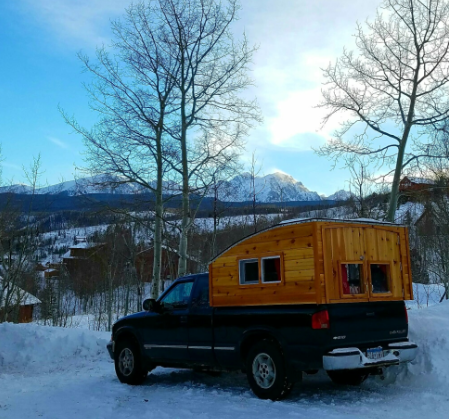
- Warmth! The structure is warm! I have considerable experience tent camping in winter conditions. My full-blast sleeping wardrobe consists of a 15*F sleeping bag, heavy wool socks, two-three synthetic and silk long underwear layers, 3-4 upper layers including expedition-weight sweater and puffy jacket, hat, light gloves, buff/scarf. This would be necessary for me to tent-out in conditions of 25*F.
I’ve noticed that I only need half the layers to keep warm in my camper, with a few nights ranging down to 15*F. In fact, the ambient temperature stays above freezing inside. Even warmer with 6+” of powder on the roof.
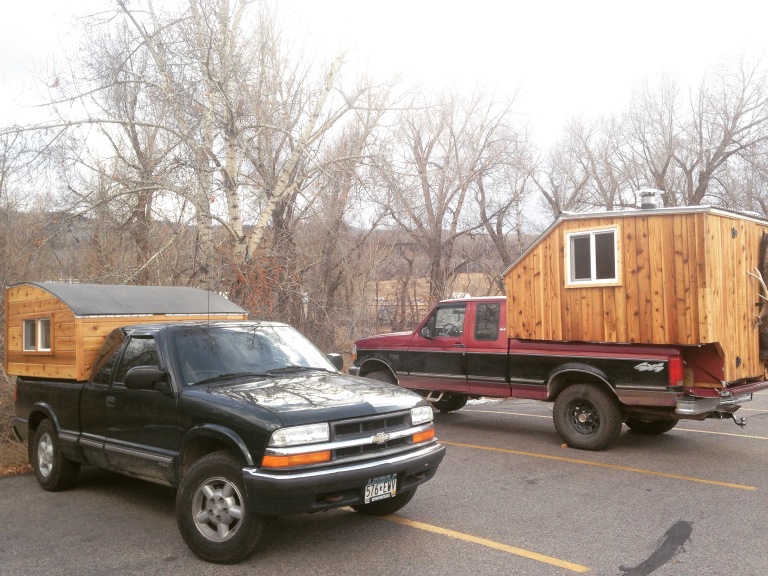
- Make one of these if you want new friends. I meet new people every day because of it.
Also, I often feel like a pregnant woman whose belly gets touched by strangers, but instead of my belly it’s my truck, and instead of touching, they’re asking questions. So it’s really not that bad. Truck camper and tiny home people are generally good fun.
- And last but not least: Total project cost. I spent a lot of time researching ways to keep project costs down. Despite searching for deals, using scrap lumber, making DIY solutions, there were costs I didn’t expect. For example, buying extra contact cement, foamboard cement, extra varnish, tearing apart/rebuilding the frame.
After all things considered, I spent somewhere between $1,200-$1,400 on my camper. This was double my original budget, but I also started the project with little scope. This estimate also includes the finer details of upholstery, bed mats and my propane grill setup.
